
Everton once watched a club veteran in Port of Spain re-glue his own rubber in the parking lot before a match, working with the unhurried precision of a man performing a small ritual rather than a chore: three thin coats, drying between each, the blade laid flat on a towel so no dust could settle into the tack. Watching him work was a complete lesson in how to glue table tennis rubber. He’d been playing for over twenty years. He still did it himself, every single time, and refused to explain why when asked, beyond a shrug and “because I want to know it’s right.”
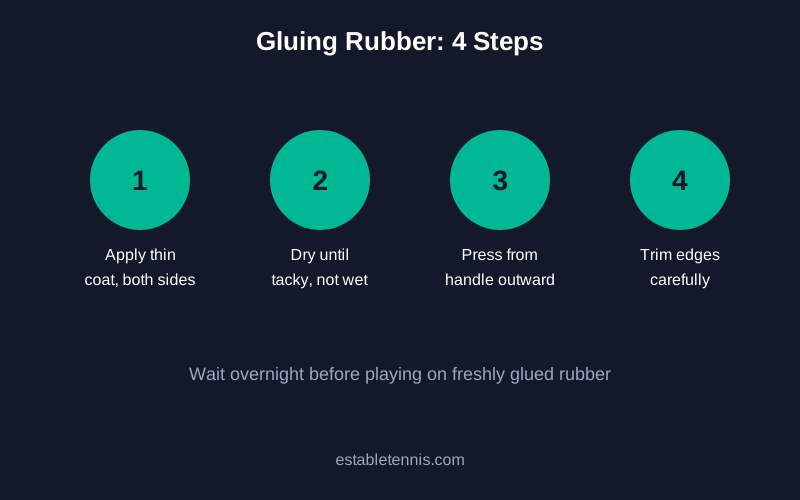
Apply a thin, even layer of water-based table tennis glue to both the blade and the rubber sponge, let each dry until tacky (not wet), then press the rubber onto the blade from the handle outward, smoothing air bubbles toward the edges before trimming the excess rubber with a sharp blade.
Gluing rubber is one of those maintenance tasks that looks trivial until it’s done badly once, and then a player understands exactly why the veteran in the parking lot never let anyone else near his blade.
Water-based only, and check the label if there’s any doubt.
What glue should you actually use?
Modern water-based table tennis glue is the standard and, in most competitive contexts, the only legal option: older speed glues that used volatile organic solvents to boost rubber elasticity were banned by the ITTF for health reasons and are no longer used in sanctioned play. A dedicated water-based rubber cement designed specifically for table tennis rubber, not a generic craft or contact adhesive, is what every legitimate glue job requires.
Match the applicator, the drying environment, and the water-based formula specifically, and the whole process stops being intimidating and starts being routine, which, for a task most players will repeat a dozen or more times over a playing career, is exactly what it should be.
What tools do you need before starting?
A clean, flat work surface, the water-based glue itself, a foam or brush applicator (many glues come with one built into the bottle cap), a roller or the flat edge of a card for smoothing, and a sharp utility blade or rubber cutter for trimming. Painter’s tape around the blade’s edge is optional but helps keep glue off areas you don’t want coated.
Clean the old surface as carefully as you’d glue the new one: the two steps aren’t separate chores, they’re the same job, just at opposite ends of a rubber’s life.
How do you prep the blade and rubber before gluing?
If you’re replacing old rubber, the blade surface needs to be fully cleaned of the previous glue layer first: gluing fresh rubber over old, uneven residue creates an inconsistent bond and an uneven playing surface. Peel off remnants gently and use a rubber cleaner or light sanding (very light, just enough to remove residue, not the wood itself) to get back to a clean surface.
Rushing this one small step is how a perfectly good rubber ends up feeling wrong for reasons the player never traces back to where the actual problem started.
What’s the actual gluing process, step by step?
Apply a thin, even coat of glue to the blade surface using the applicator, working in one direction to avoid streaks. Apply a similarly thin coat to the sponge side of the rubber. Let both coats dry until they’re tacky to a light touch but no longer wet or glossy. This typically takes several minutes depending on humidity, and rushing this step is the single most common mistake, since gluing while still wet traps moisture and weakens the bond over time.
The handle-first alignment isn’t a small technicality: it’s the anchor point every other decision on the racket surface gets measured against, and getting it wrong by even a couple of millimeters throws off contact feel in ways that are hard to trace back to their actual source.
How should the rubber actually be pressed onto the blade?
Align the rubber carefully at the handle end first: this is the reference point, since any misalignment here throws off your entire hitting surface. Press down and smooth outward toward the tip and edges in one continuous motion, working air bubbles out toward the sides rather than trapping them in the middle.
A roller or the flat edge of a card, run firmly across the surface, ensures full contact and eliminates any pockets of trapped air that would otherwise create a dead spot on the racket.
A single reckless pass with a sharp blade, right at the edge of a fresh bond, is how more than a few otherwise perfect glue jobs end up with a permanent, visible scar along the border.
How do you trim the excess rubber cleanly?
Once the rubber is fully bonded, run a sharp blade along the edge of the wood, cutting outward and away from the blade to avoid gouging the wood itself. Trim in short, controlled passes rather than one long cut: a single aggressive pass is how most players end up with a nicked blade edge or an uneven rubber border that catches on the net or table during play.
The night-before window exists for a reason no amount of impatience can shortcut: the bond needs real time, not just apparent dryness, to fully settle under the stress a hard-hit ball will eventually put on it.
How long should you wait before playing on freshly glued rubber?
At least a few hours, though overnight is safer, particularly for a first-time glue job. Playing too soon on rubber that hasn’t fully cured can shift the bond slightly under the stress of hard contact, creating an inconsistent playing surface exactly when you need it to be predictable, usually the day before a match, which is precisely the wrong moment to discover a bad bond.
How often does rubber actually need to be re-glued or replaced?
Re-gluing isn’t typically needed unless the bond has failed (bubbling, lifting at the edges) or you’re replacing worn rubber entirely. For guidance on when the rubber itself (not just the glue job) needs replacing, see our full breakdown on how long table tennis rubber lasts.
How does gluing rubber differently affect how it plays?
A properly glued rubber, fully bonded with no trapped air and cured completely, transfers energy from the blade to the ball as efficiently as the rubber’s own design allows. A poorly bonded rubber (rushed drying time, trapped bubbles, uneven pressure during application) introduces a layer of inconsistency between the blade and the rubber itself, which shows up as dead spots or unpredictable response that has nothing to do with the rubber’s actual specifications.
This is a subtle but real equipment variable that gets almost no attention compared to rubber choice or hardness, despite directly affecting how faithfully your chosen rubber’s characteristics actually reach the ball.
Why did speed glue become such a big part of table tennis culture before it was banned?
Solvent-based speed glues swelled the sponge on contact, temporarily softening it and boosting elasticity beyond the rubber’s factory-rated performance, a genuine, measurable competitive advantage that became so widespread through the 1990s and 2000s that re-gluing before every single match became an entrenched ritual for players at every level, not just professionals.
The ITTF ban wasn’t primarily about competitive fairness, though that was a factor: it was driven by health concerns over players regularly inhaling volatile organic compounds in poorly ventilated venues. The ritual habit of pre-match gluing outlived the actual chemical reason for it, which is why some longtime players still re-glue before matches out of pure habit, using modern water-based glue that provides none of the banned speed-glue effect.
What’s the difference between gluing a full sheet and re-gluing a partially lifted edge?
A full re-glue, replacing the entire bond from scratch, is the appropriate approach whenever rubber is being newly mounted or the old bond has failed significantly. A minor edge lift, where only a small section near the border has separated, can sometimes be spot-repaired with a small amount of fresh glue applied directly to the lifted area, pressed and held until tacky, without redoing the entire surface.
This spot-repair approach only works for genuinely minor lifting: anything beyond a small edge section warrants a full re-glue rather than risking an uneven bond across the whole surface.
Does the blade material affect how glue bonds?
Yes, to a degree. Untreated wood blade surfaces generally bond well with water-based glue without much special preparation. Blades with a factory-applied sealant or varnish layer can sometimes bond less reliably, since the glue is adhering to a coating rather than the wood itself. In these cases, a slightly heavier first coat, fully dried before the rubber is pressed on, helps ensure a solid bond.
If a blade consistently struggles to hold a rubber bond despite correct technique, checking whether the blade surface itself has an unusual coating is a reasonable next diagnostic step.
What’s the most common beginner mistake specific to the gluing process itself?
Pressing the rubber onto the blade while the glue is still wet, rather than waiting for both surfaces to reach the correct tacky-dry state. This single mistake accounts for the majority of bad bonds (bubbling, uneven adhesion, a soft or spongy feel across the playing surface), and it happens because the tacky-but-dry window can be easy to misjudge on a first attempt, particularly in humid conditions where drying takes noticeably longer than the instructions on a glue bottle might suggest.
How does humidity specifically affect the gluing process?
High humidity extends drying time significantly, meaning a coat that would reach tacky-dry in five minutes in a dry climate might need considerably longer in a humid one. Rushing this step under humid conditions is one of the most common causes of a failed first attempt. Testing the glue’s actual tackiness with a light touch, rather than relying purely on a fixed time estimate, is the more reliable approach regardless of climate, since it responds to actual conditions rather than an assumption that may not hold.
Is it worth practicing gluing on an old or spare rubber before doing it on new gear?
Genuinely, yes, and this is underused advice. A first attempt at gluing new, expensive rubber straight onto a blade you actually care about carries real stakes: a bad first bond means peeling off partially bonded rubber and starting over, which is messier and more wasteful than practicing the full process once on old, already-worn rubber first. Treating the first attempt as a low-stakes rehearsal, using gear you’re not attached to, builds the muscle memory for timing and pressure before it actually matters.
How do you safely remove old rubber before re-gluing new rubber onto the same blade?
Peel the old rubber slowly and evenly from one corner, working across the surface rather than pulling straight up from the center, which reduces the risk of tearing or damaging the blade’s wood surface underneath. Once removed, residual old glue typically needs light cleaning (either a dedicated glue remover product or careful, minimal sanding) to return the blade to a flat, even surface before any new glue is applied. Skipping this cleanup step and gluing fresh rubber directly over old residue is a common shortcut that produces an uneven bond and an inconsistent playing surface.
Does the number of glue coats actually matter, or is one enough?
Multiple thin coats, each fully dried before the next is applied, produce a more even, reliable bond than a single thick coat, which is prone to uneven drying and can leave wet pockets underneath an apparently dry surface. Two to three thin coats on both the blade and the rubber sponge, each allowed to dry to tacky before proceeding, is the standard approach most experienced players and shops follow, and it’s worth the extra few minutes compared to rushing a single heavier application.
What’s the relationship between a good glue job and equipment longevity overall?
A properly bonded rubber sheet ages more predictably and evenly than one with an inconsistent bond, since trapped moisture or uneven pressure points from a bad initial glue job can accelerate localized wear in specific areas rather than the gradual, even degradation covered in our guide on how long table tennis rubber lasts.
A rushed, poorly executed glue job doesn’t just risk immediate performance issues: it can quietly shorten the rubber’s effective lifespan by creating weak points that fail earlier than they otherwise would.
There’s a version of table tennis maintenance that treats gluing as a chore to get through as fast as possible, and there’s the version the veteran in that parking lot practiced: unhurried, attentive, treating each coat as worth doing properly rather than worth finishing quickly.
Both approaches produce a playable racket most of the time. Only one of them produces a racket the player actually trusts completely, the moment the first serve of a match lands on it.
Quick Recap: How To Glue Table Tennis Rubber
Getting how to glue table tennis rubber right comes down to matching the equipment to where you actually are, not where marketing copy wants you to be. Revisit this whenever your game changes enough that the current setup starts feeling wrong.

Frequently Asked Questions
According to the ITTF equipment regulations, all racket coverings must meet specific approval standards before use in sanctioned competition.
Can I use regular super glue or craft glue on table tennis rubber?
How long should glue dry before pressing the rubber on?
What happens if I trap an air bubble under the rubber?
Do I need to re-glue rubber every time I play?
Can I glue rubber myself, or should I take it to a shop?
The veteran in the parking lot finished his three coats, pressed the rubber on with the same unhurried motion he’d clearly repeated hundreds of times, and walked into the hall to lose in straight games to a seventeen-year-old twenty minutes later. He didn’t seem bothered. He’d known exactly what his racket would do the entire match, which, it turned out, was worth more to him than the result.
Not sure which rubber is even worth the effort of gluing onto your current blade? PingPath gives you a fitted setup recommendation in under three minutes.
Leave a Reply